How to Remotley Control Raspberry Pi Gpio Pins
There are many different ways to use your mobile phone to remotely control and manage any Raspberry Pi and one of the best options out there to date is the phone application RaspController(you can also find it for free in the Google Play Store). SimplePi is the iOS App equivalent, most features it has and when it does screenshots of it the features be found in tandem to the RaspController images. Once connected together this application will allow you to control every GPIO port, send commands via SHH to the Raspberry Pi terminal, shortcut those terminal commands so they can be activated using a single click, view images from a connected camera, collect data from different sensors, access all the files/folders and has full PiSense HAT compatibility. It also provides CPU speed and temperatures so you can keep track of the operation of Raspberry Pi Boards remotely. Wiring diagrams, GPIO pins outs and resources are available within the application as well.
Now connecting to a Raspberry Pi Remotely is no huge feat, as remote access via virtual desktops (usually through SSH) is very commonplace however this often results in an unwieldy user interface (UI) for Mobile Phone users to navigate. This application instead makes the whole experience much more user-friendly and elegant to navigate. Almost everyone walks around with mobile phones wherever they go nowadays (if you don't in Australia you are effectively banned from entering restaurants - Update - one can now be supplied a personal QR code to gain access to restaurants) and with this application providing really fast ways to get python codes up and running remotely, it was just too cool not to explore. Below are the contents of this guide.
- Connecting the Raspberry Pi to RaspController
- Menu Overview
- GPIO Pin Control (On and Off LED Example)
- SSH Shell - Raspberry Pi Terminal and Creating Commands (Check PiJuice Battery Example) ![]()
- Raspberry Pi Sense HAT Control and Sensor Data
- Raspberry Pi CPU, RAM and Disk Monitoring
- Folder Exploration
- Shutdown and Reboot Buttons
Worth noting, for the set up here my Raspberry Pi connects automatically to my Mobile Phone's internet hotspot. Thus everything is connected on the same network which I use to activate all these features. If you are looking to access the Raspberry Pi from outside your local network, you will need to set up a port forwarding rule on your home router. Doing this will change the configuration of your router to forward all inbound traffic from the internet to a specific port which is the local IP address of the Raspberry Pi. Most routers have this feature available but make sure to change the default Raspberry Pi user/password when doing so to keep your security high.
If you happen to be holding a Raspberry Pi board and not quite sure what it is? Then check out the guideRaspberry Pi Generationsto identify it. As always if you have any questions, queries or things to add please let us know your thoughts!
Connecting the Raspberry Pi to RaspController
Connection is easy once you have connected the Raspberry Pi and your phone to the same network and ensured the Raspberry Pi will work with SSH.SSH or Secure Shell is a network communication protocol that enables two computers to communicate and is by default the SSH is turned off on Raspberry Pi single-board computers.
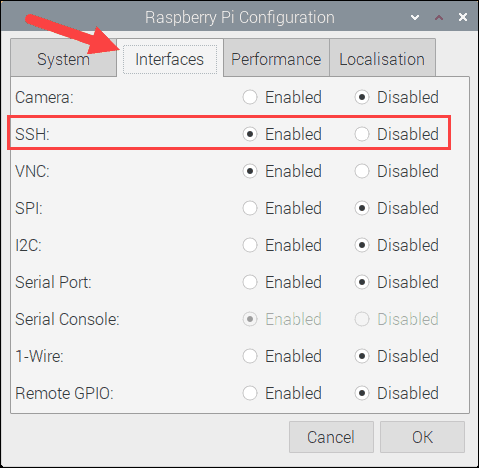
To enable SSH go through the same process as this guide to connect all the plugs and have Raspberry Pi OS open on your desktop. Then SSH can be enabled manually from the desktop by doing the following.
-
Launch | Raspberry Pi Configuration | from the | Preferences | menu. See below for this window.
-
Navigate to the | Interfaces | tab.
-
Select | Enabled | next to | SSH |.
-
Then once you click | OK | the setting will be saved.
Having achieved this you will now be able to use your phone. Jump to | Add Device |option and type in the Host/IP Address of your Raspberry Pi. You can display the IP address of your Raspberry Pi by typing | hostname -I | into the Raspberry Pi Terminal or by checking your router's device list. Leave everything else as normal and if you have not changed the default the Username will be | pi | and the Password will be | raspberry |. The section filled out can be seen below which is a screen capture from my Mobile Phone.

Then once that section is complete press that little floppy disk icon to save the details and you will see your Raspberry Pi in the list of available devices that you can connect to. See below for my Raspberry Pi 4 Model B connected to the RaspController App on my phone.

So that is all the technical stuff done let's show off what we can do with this!
Menu Overview
Starting off I'll show you what options you are presented with once you click on your connected Raspberry Pi which you can see in the images below. All sections are intuitive and work just as they should.


GPIO Pin Control (On and Off LED Example)
So let's dive into some examples starting with GPIO pins, perfect for connecting you to the real world . GPIO pins (and power pins) are utilised to control and communicate with other components. So if you want to control the world GPIO pins are the way to go. Whether it's turning off a switch, or turning on an LED, or controlling a relay that turns the lights on your house or opens your garage or lights up your Christmas display or even controlling enough devices to take over the world. All these things can be done with your little computer driving those GPIO Inputs and Outputs.
With the RaspConnect App you can remotely control every single GPIO (General Purpose Input and Output) Pin and tell it to either send electricity through it or not. That means you can effectively control 40 things uniquely with all these pins on a Raspberry Pi 4 Model B.
Once you have the skills to control GPIO in your hands it opens a floodgate of creativity so in the below example I will keep it fast and snappy. Below demonstrate how to turn a GPIO connected LED light on and off from your phone. With this skill under your belt there truly is absolutely nothing you can't expand this to (perhaps create the smart house of your dreams).
Below is the GPIO pin set up in the app.
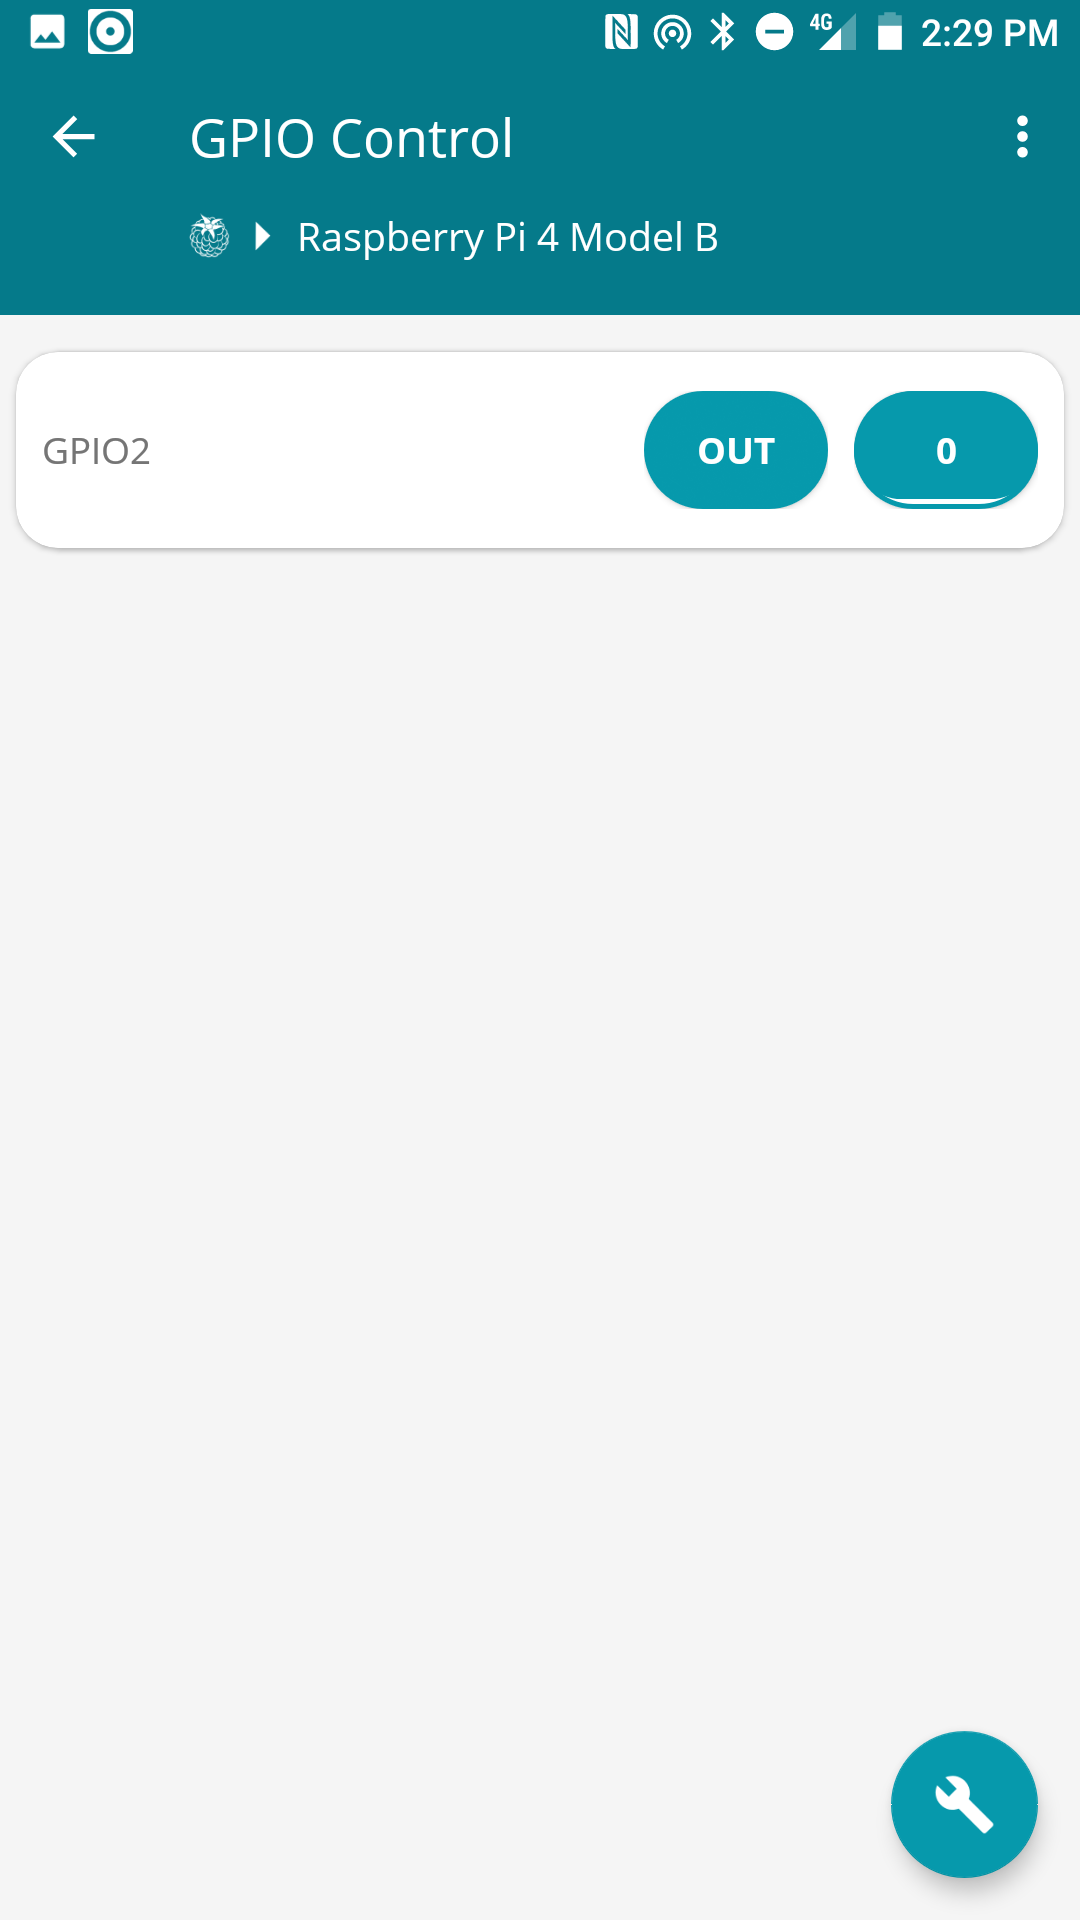
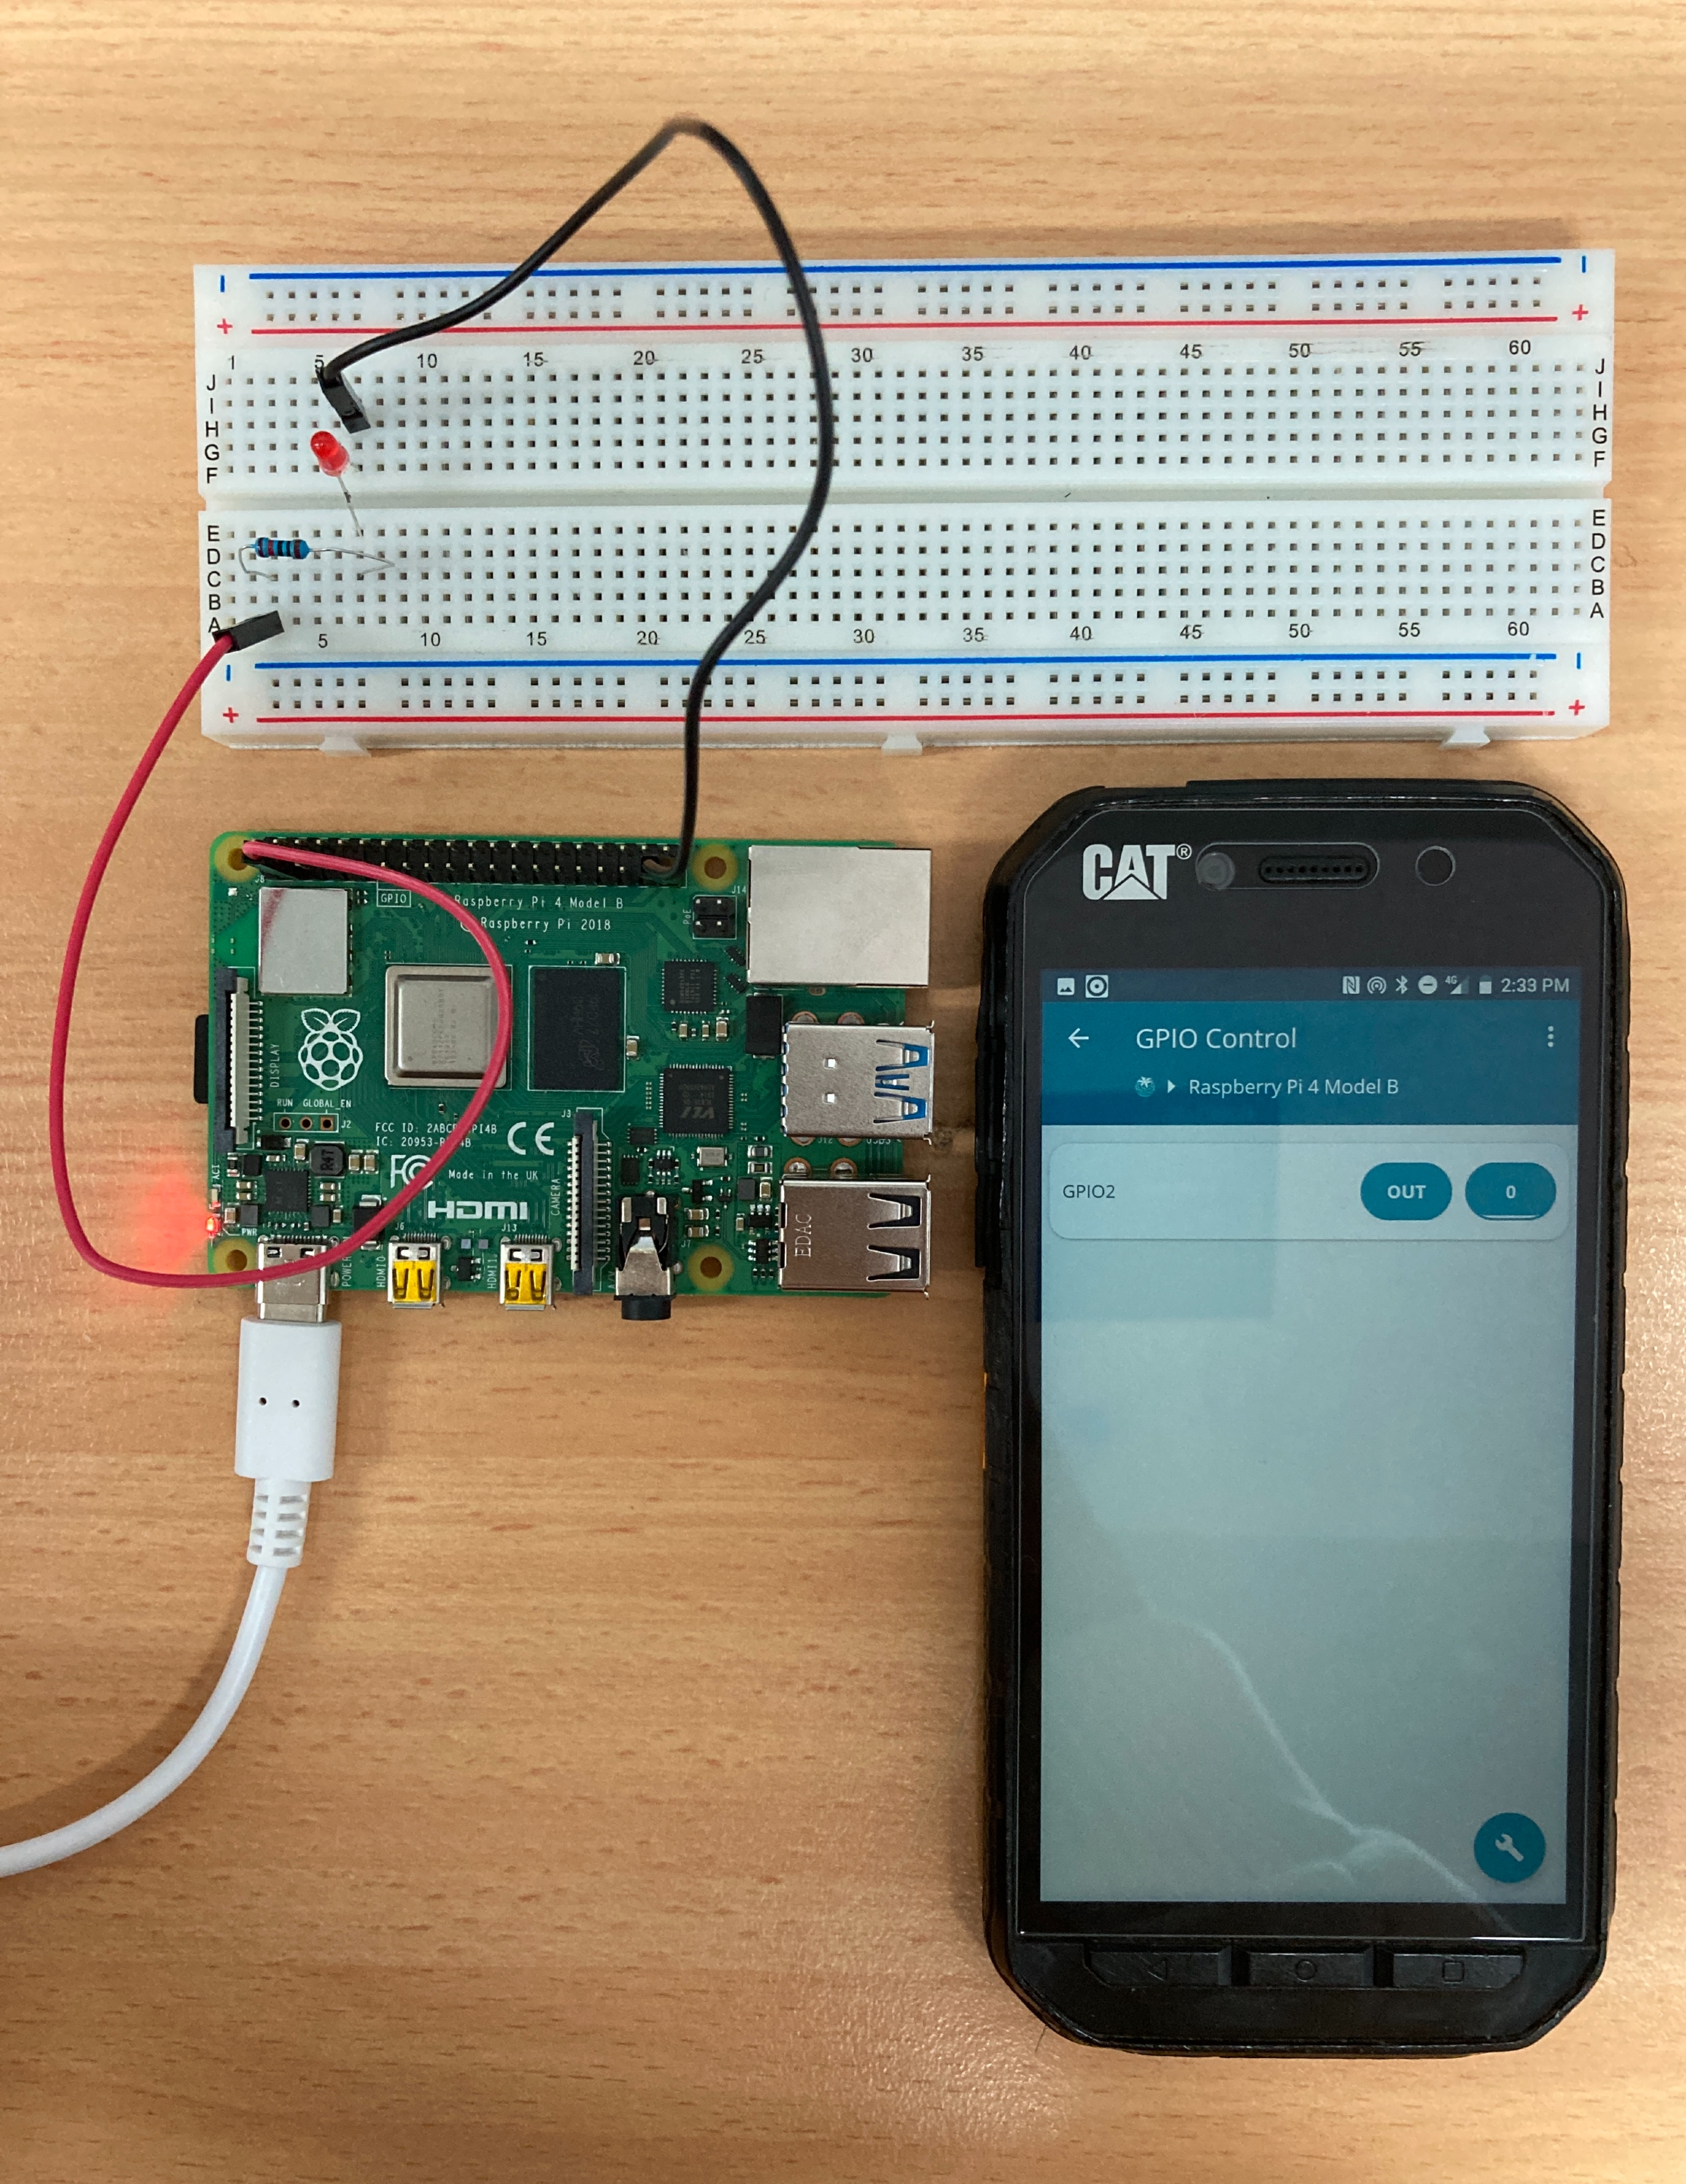
Further below is the Schematics of the Breadboard example I have set up and further below both of these is the system turning on and off the LED depending on whether I press the button or not. The red live wire is connected to the GPIO2 Pin on the Raspberry Pi 4 Model B Board and the black ground wire is connected to any Ground GPIO Pin.

Demonstration of this system running below with the power to illuminate the LED being provided by the Raspberry Pi and decided by me via the RaspController App. Below the light is turned on.

Then when I press on the GPIO2 Pin button on my screen it powers down the LED so no light goes through it. Happens with no human perceptible delay. When I spam the button it does slowly gain a delay.
SSH Shell - Raspberry Pi Terminal and Creating Commands (Check PiJuice Battery Example)
This application also enables you to access the Raspberry Pi Console and type whatever your heart desires into it. And if what your typing is long and arduous to do multiple times you can create commands. These commands are single-click buttons that will write whatever string of text you decide straight into the Shell and run it.
This is a great way to quickly run Python scripts that you have created. Below is the SSH Shell open in the RaspConnect App all ready to go.

Below here is the Commands section. You can see I have 4 created Commands. One will take me straight to the PiJuice UPS HAT configuration settings which you can find out more about in this guide. For this guide, it is just an example that instead of typing that | pijuice_cli |string every time you want to access this setting you can instead just simply click on the command.
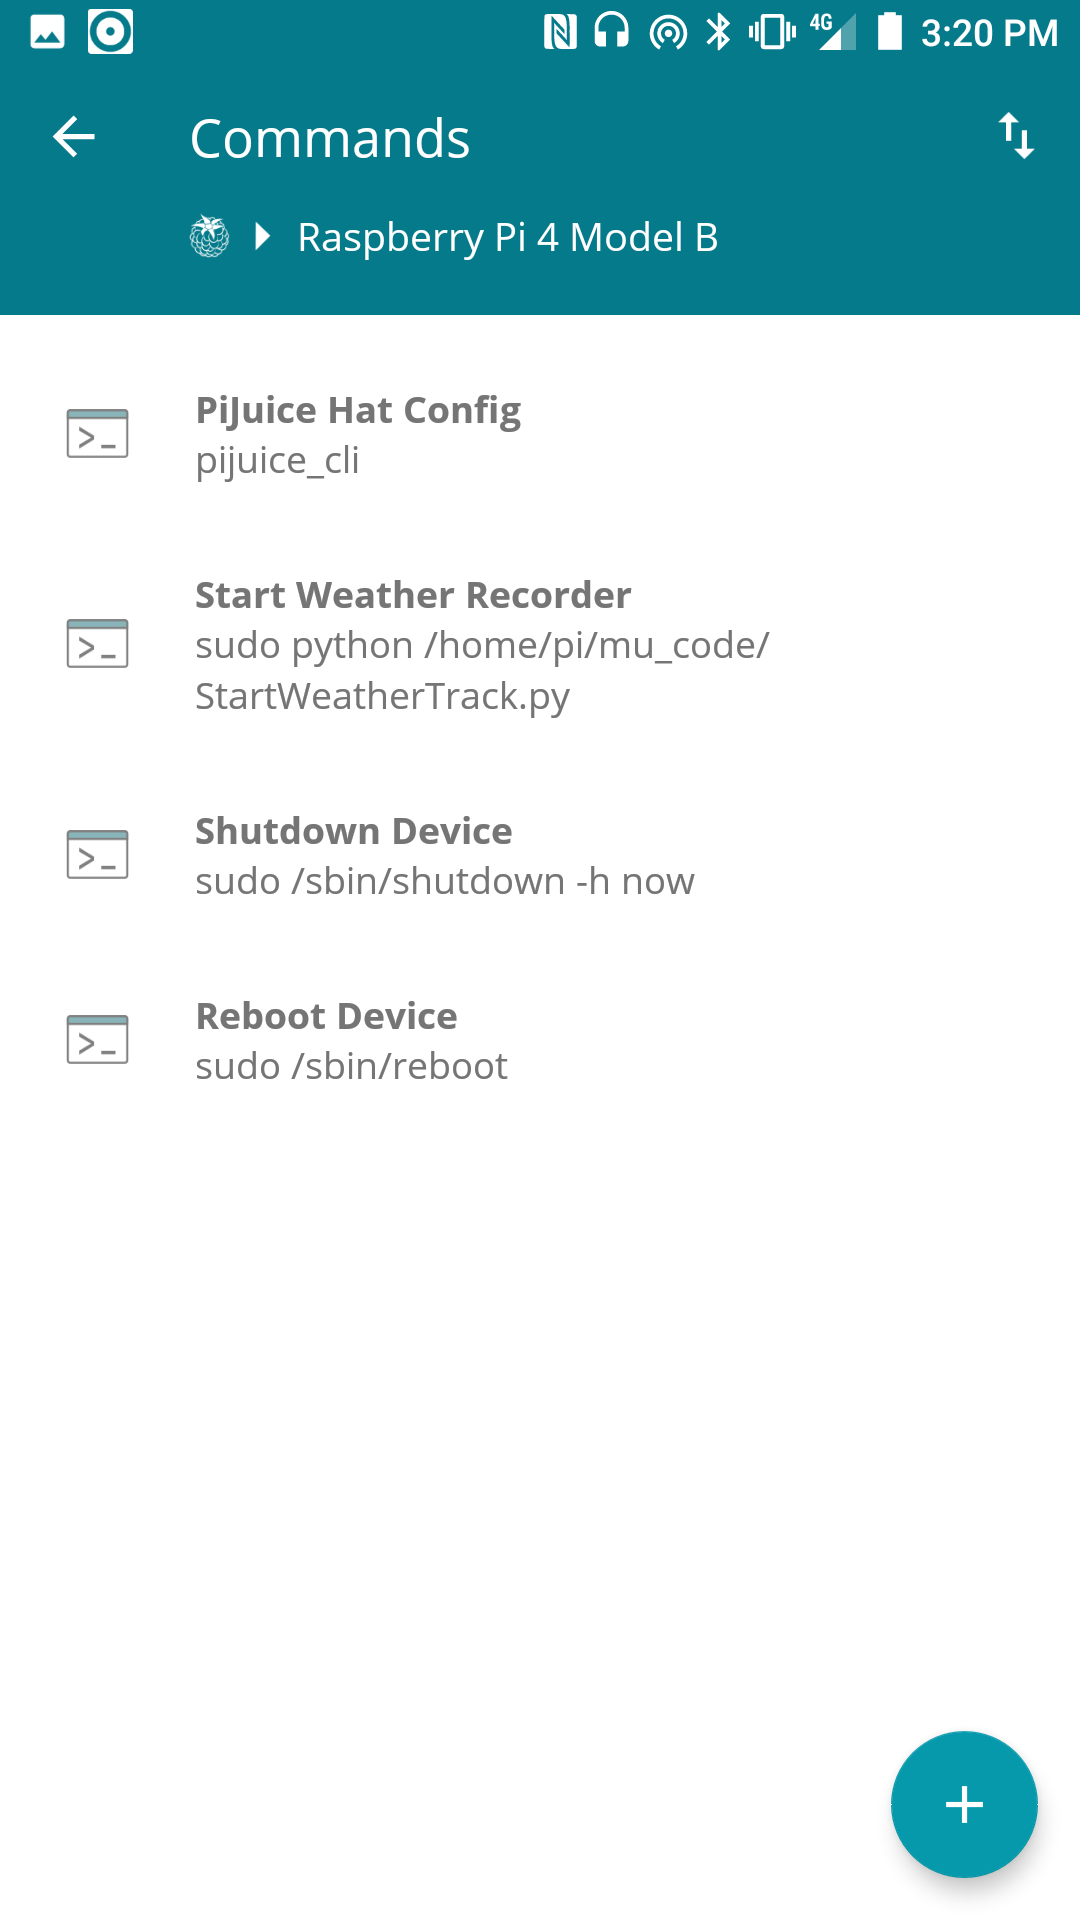
Below you can see what happens when you use the RaspController App and click on that PiJuice Setting Command I created. A single click of that will send to a page exactly the same as the image below on my phone.

Raspberry Pi Sense HAT Control and Sensor Data
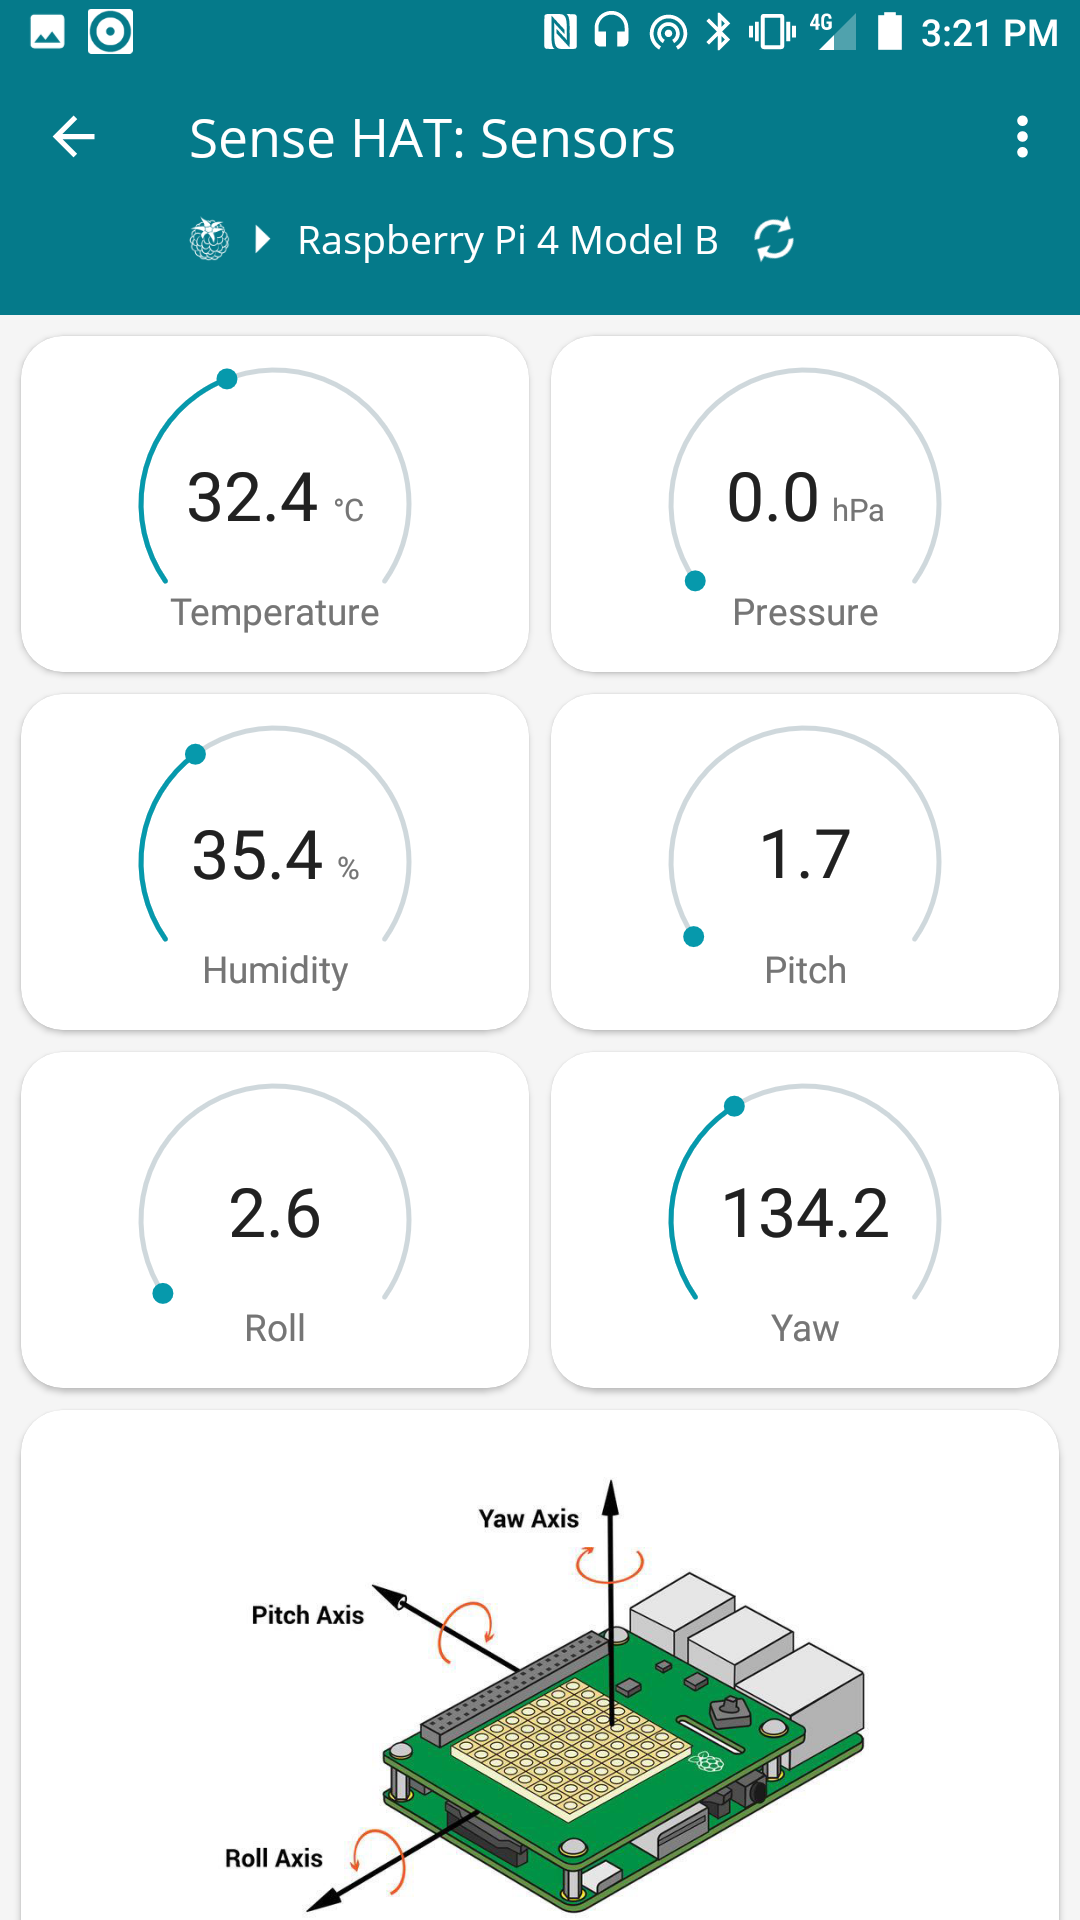
This application is also fully compatible with the Pi Sense Hat. With it you can control the LED Panel however you would like, display a message with it easily. You can also view all the data from the PiSense HAT Sensors. Both of these can be seen in the images below.

Raspberry Pi CPU, RAM and Disk Monitoring
Technical details like CPU, RAM, and Disk Monitoring can also be viewed, Every single application running and how much brainpower it is taking up on your Raspberry Pi can also be seen.


Folder Exploration
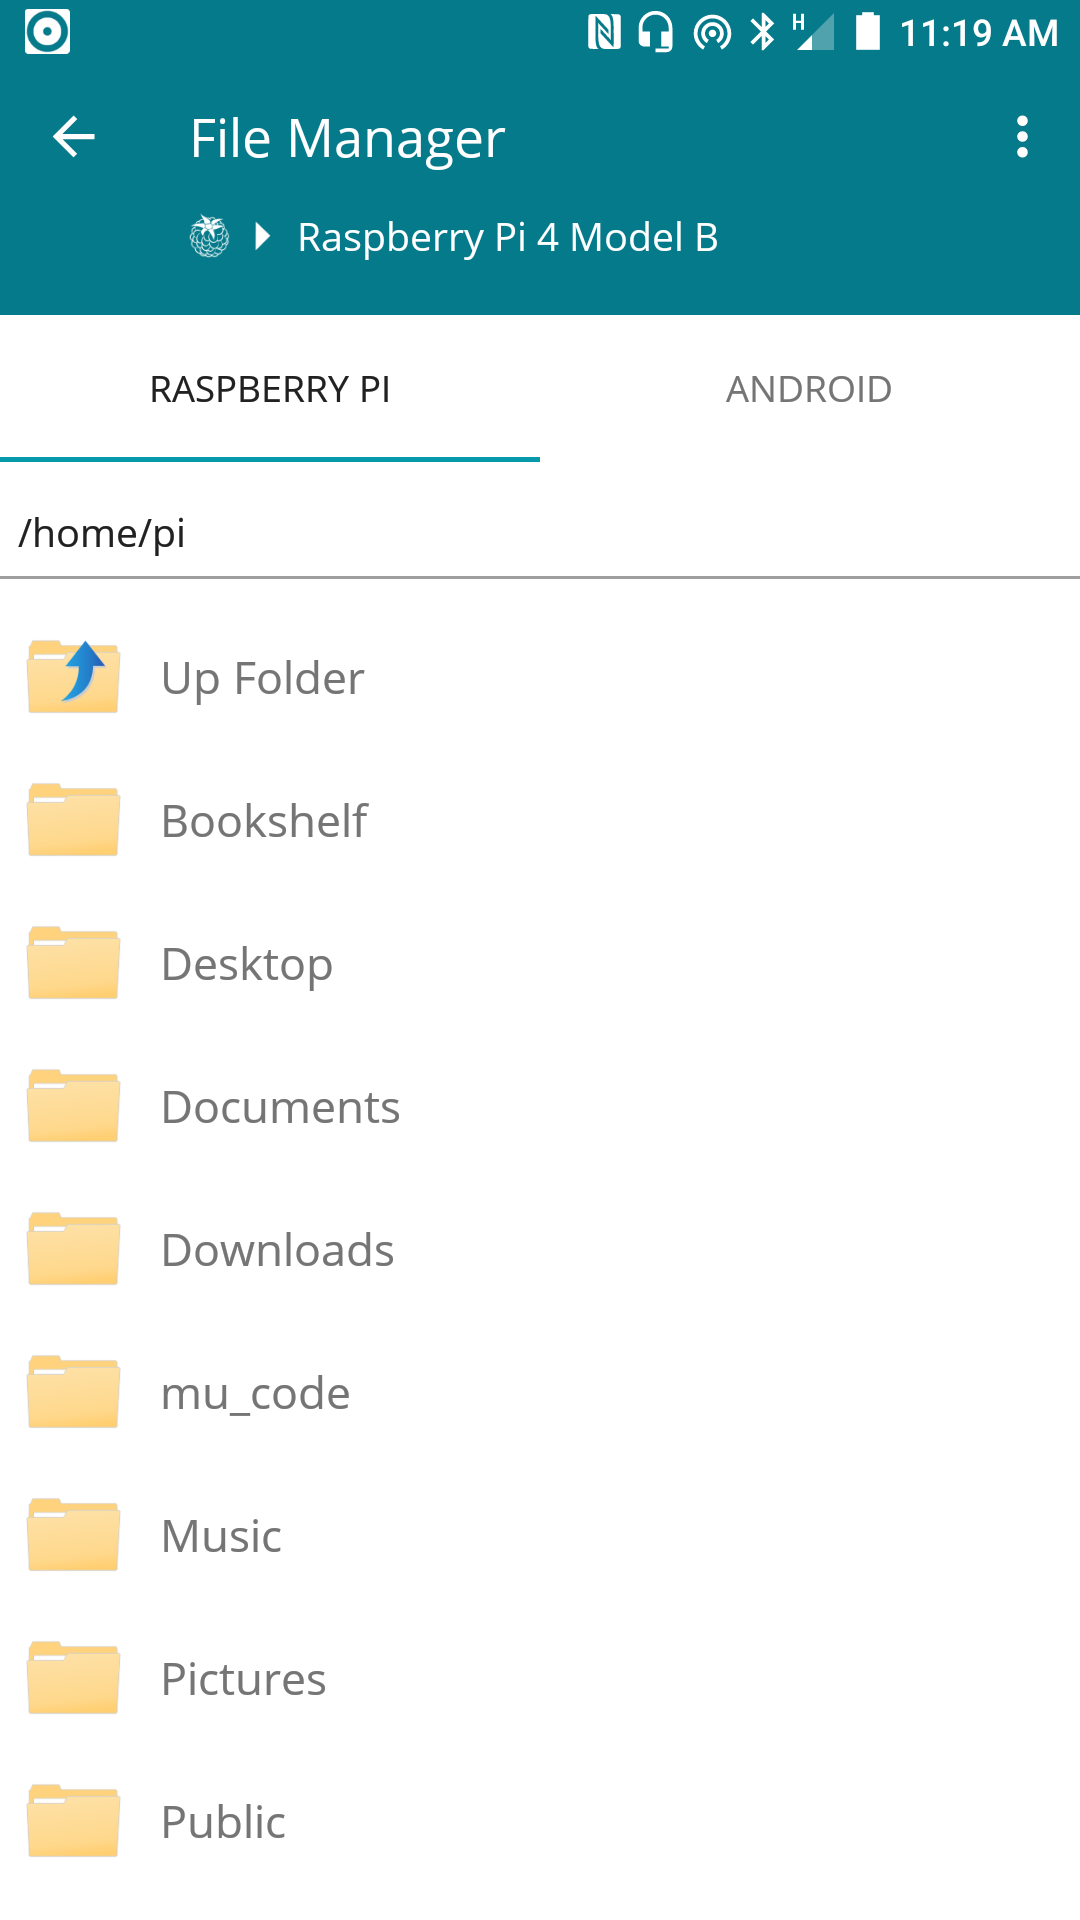
It is also easy to access, modify and take information out of the Raspberry Pi utilising the File Manager options. You can even transfer data to your phone seamlessly. Check down below for an image of the File Manager when using the RaspController App.
Shutdown and Reboot Buttons
Finally for this guide is the shutdown and reboot buttons that work just the way they should. Full control of a Raspberry Pi with great UI. After discovering RaspController I find myself using it all the time, really has revolutionised the way I interact with Raspberry Pi Microprocessors (and I have also just discovered they have a version for controlling Arduino..!)

There are many different ways to use your mobile phone to remotely control and manage any Raspberry Pi and one of the best op...
How to Remotley Control Raspberry Pi Gpio Pins
Source: https://core-electronics.com.au/tutorials/raspcontrol-raspberry-pi.html
0 Response to "How to Remotley Control Raspberry Pi Gpio Pins"
Post a Comment